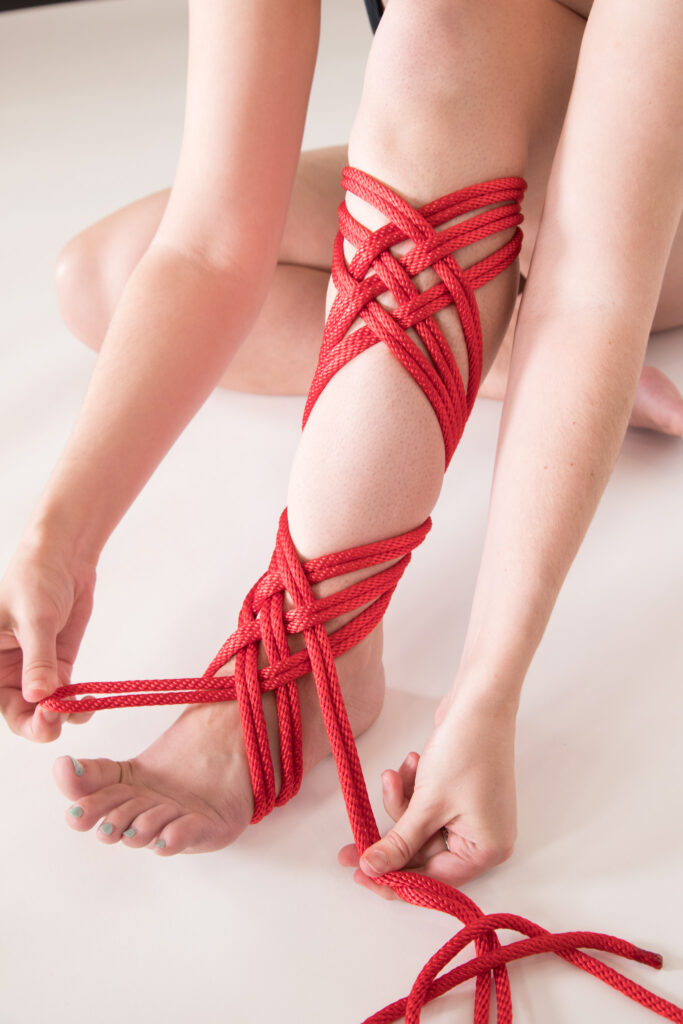
The Gravity Boot
Obviously, the most common use we see of the gravity boot is for single ankle inversions however it can also be great for assisting in transitions into hip inversions.
We like the gravity boot because it’s pretty and super sustainable.
How to Tie a Gravity Boot.
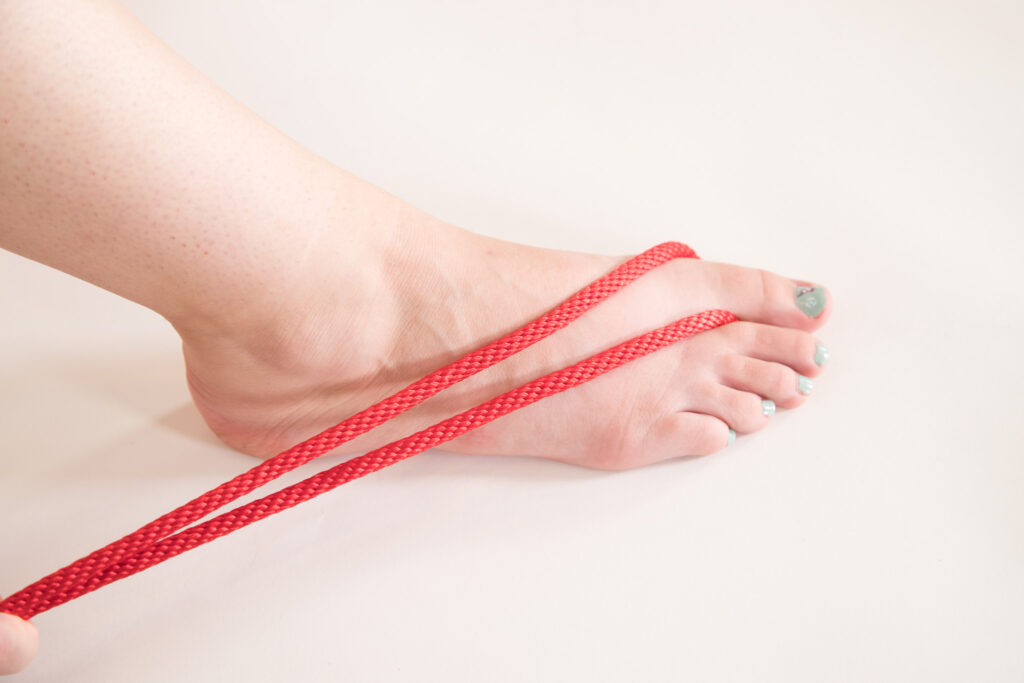
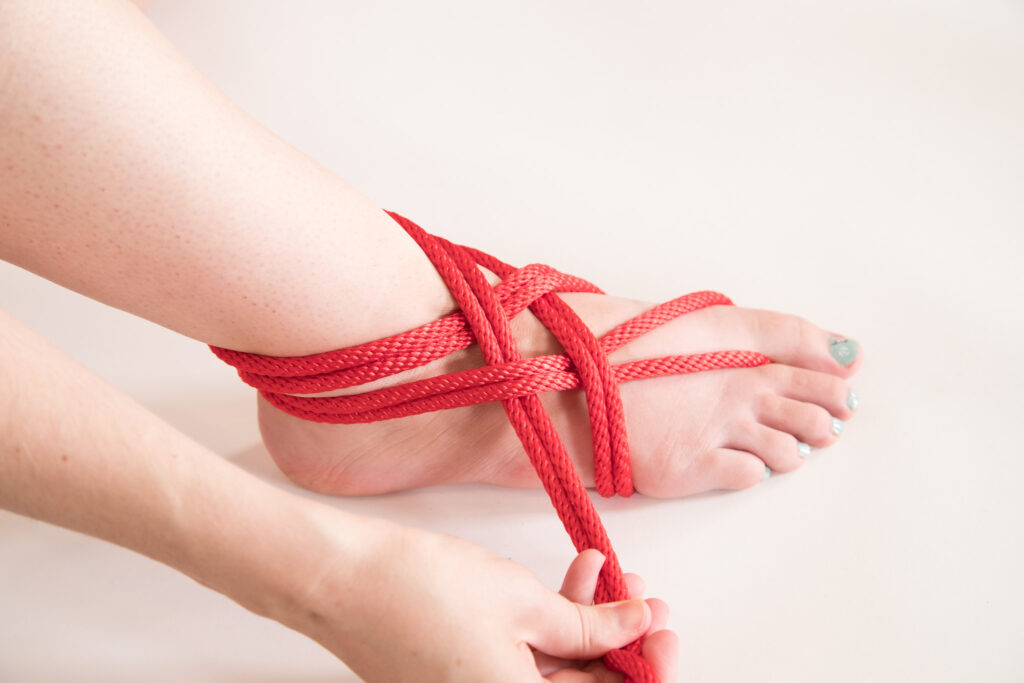
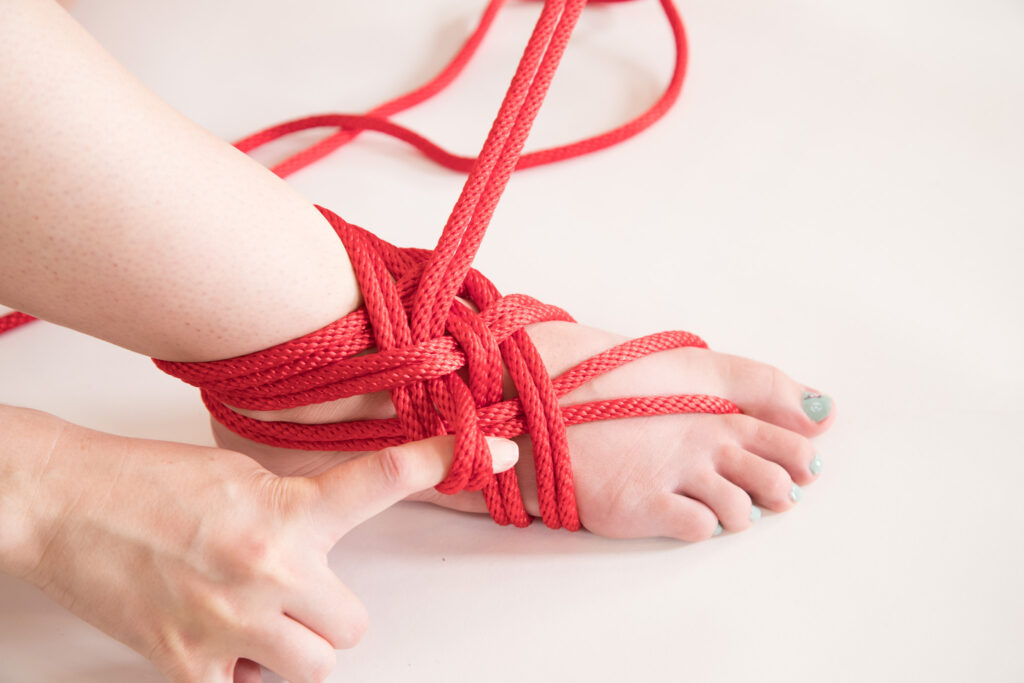
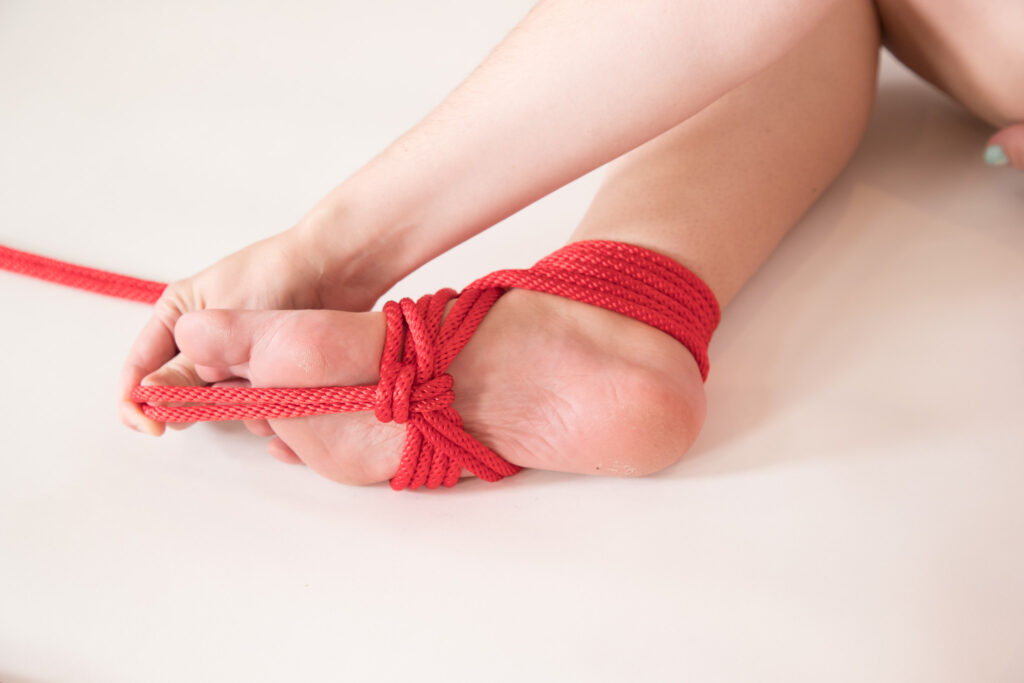
Step 1: using a 15ft length (30 ft for calf variation) of rope place the bight (middle of the rope) around the big toe
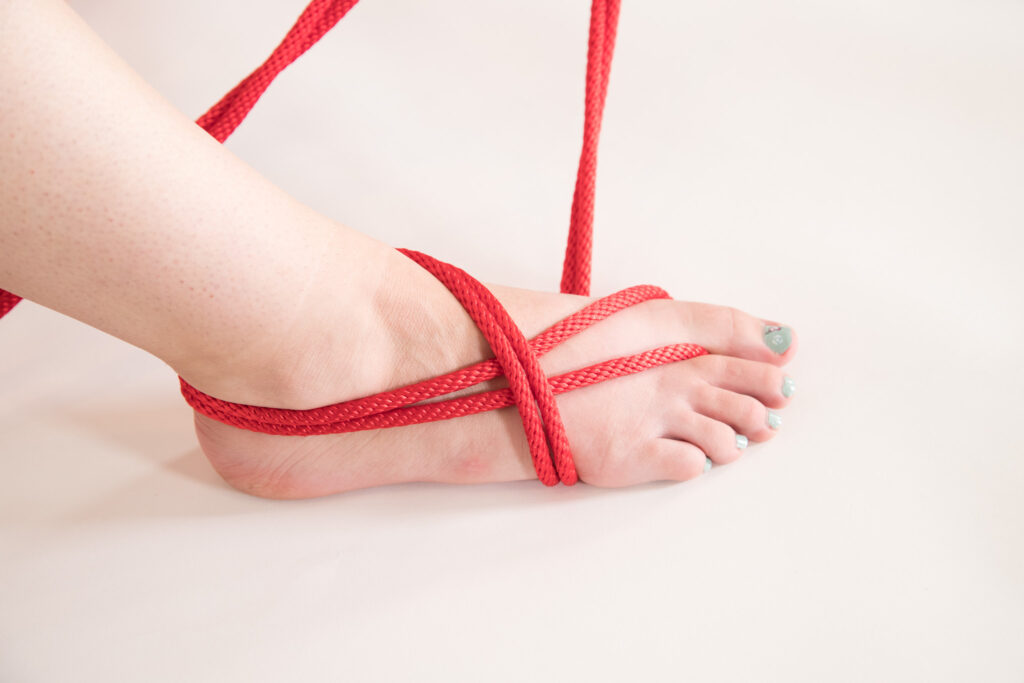
Step 2: wrap the rope to the far side of the foot (wrap towards the ankle on the outside of the foot)
[in calf variation wrap across top of shin- slightly to left or right of shin bone to avoid shin pain, and then wrap around the top of the calf]
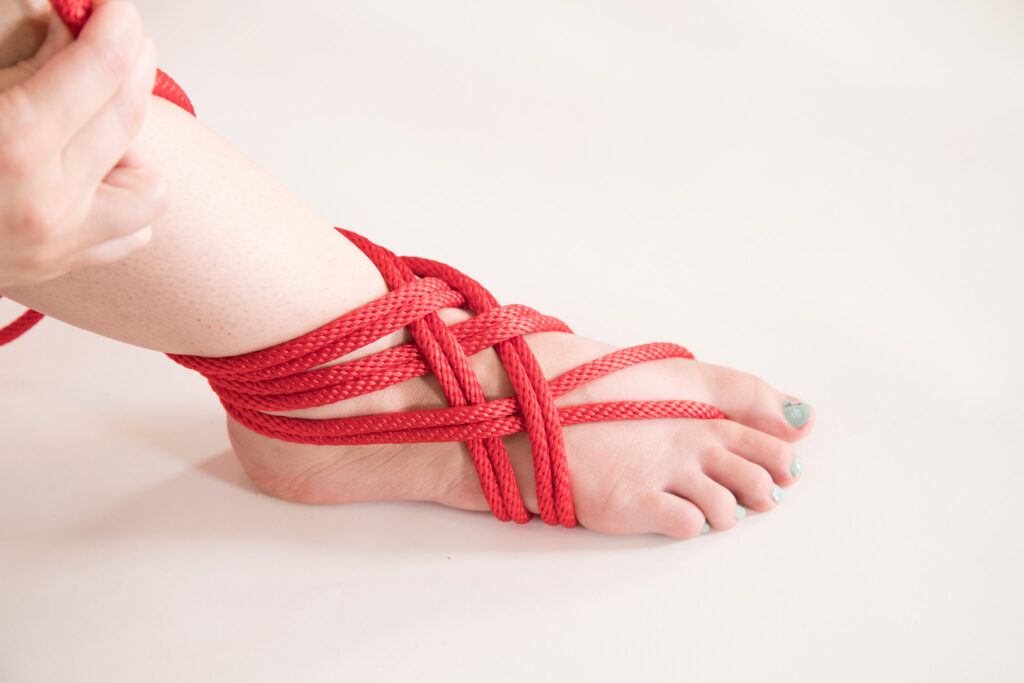
Step 3: wrap around the ankle and down towards the arch of the foot (the rope should be making an ‘X’ shape across the top of the foot)
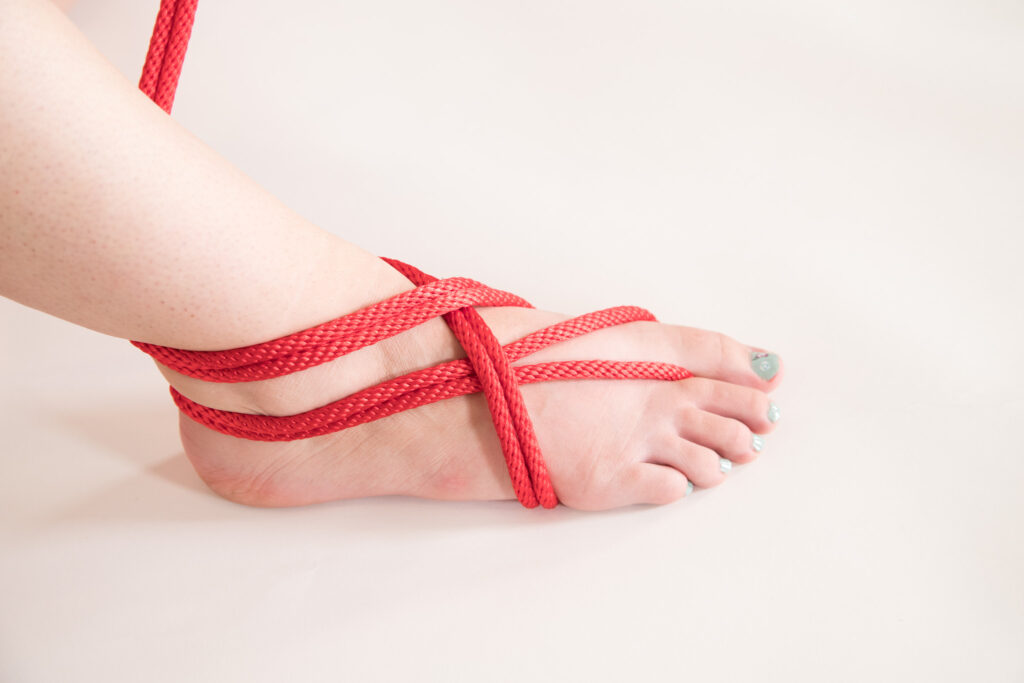
Step 4: wrap under the foot
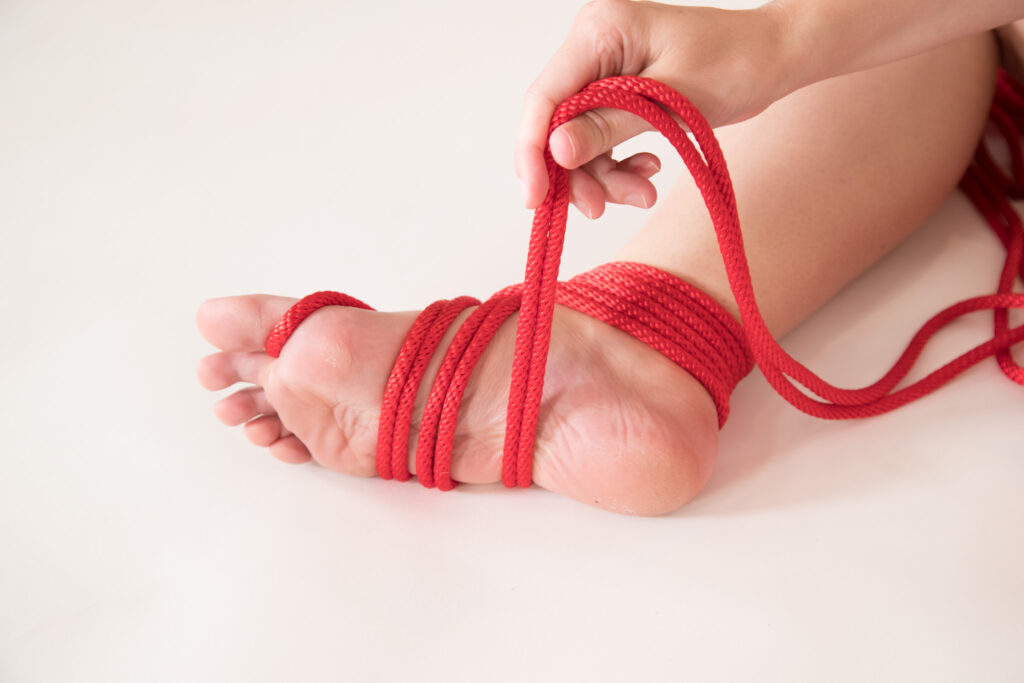
repeat steps 2 -4 until you have 3 wraps then remove the loop of rope from around the toe pull towards the bottom of the foot and tie off with a half hitch.

Notes on tying the gravity boot
- When tying calf version, maintain even tension (first pass behind calf is key)
- In general, tension of first pass is critical
- Limit yourself to 3 wraps, more wraps will crowd the ankle bones. Additionally, note that you use the metatarsal shelf as an anchor point.
- Weaving ties like this tend to tighten as they go -so start looser and increase tension with each progressive weave, the first should seem almost excessively loose. Weaving tends to be pretty forgiving even when loose it doesn’t tend to shift so feel free to experiment with different tensions and see what feels good.
- Where you start wrapping from ( using the big toe and running to the far side of the able versus the closer side parallel to the foot) will alter the amount of tie off line.
- As you can see if you tie this looser the rope will tend to move more towards the middle of the arch
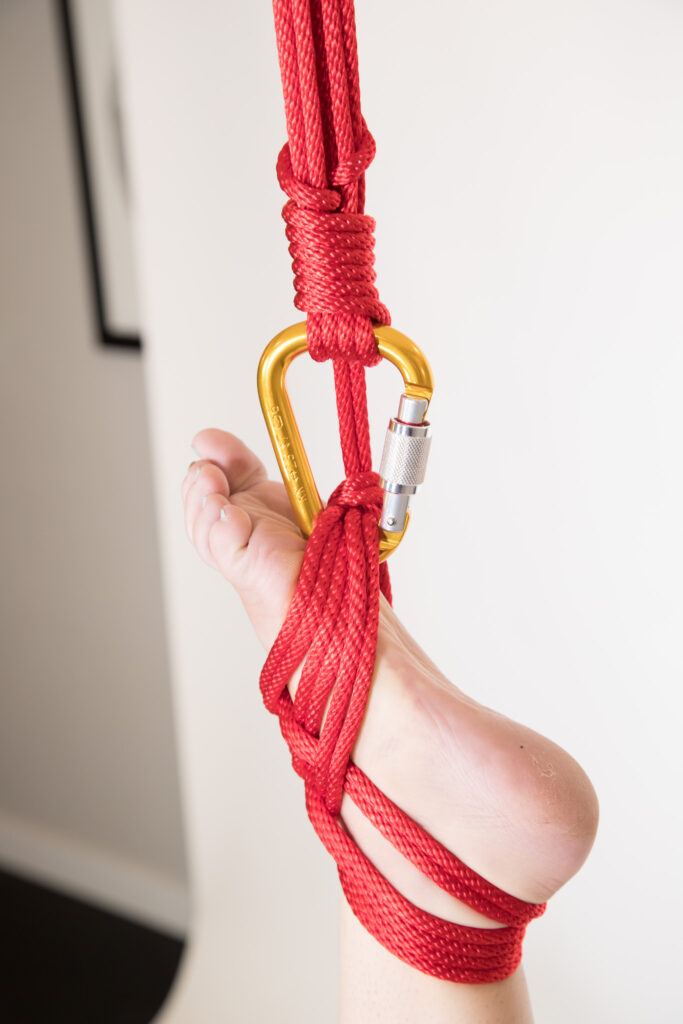
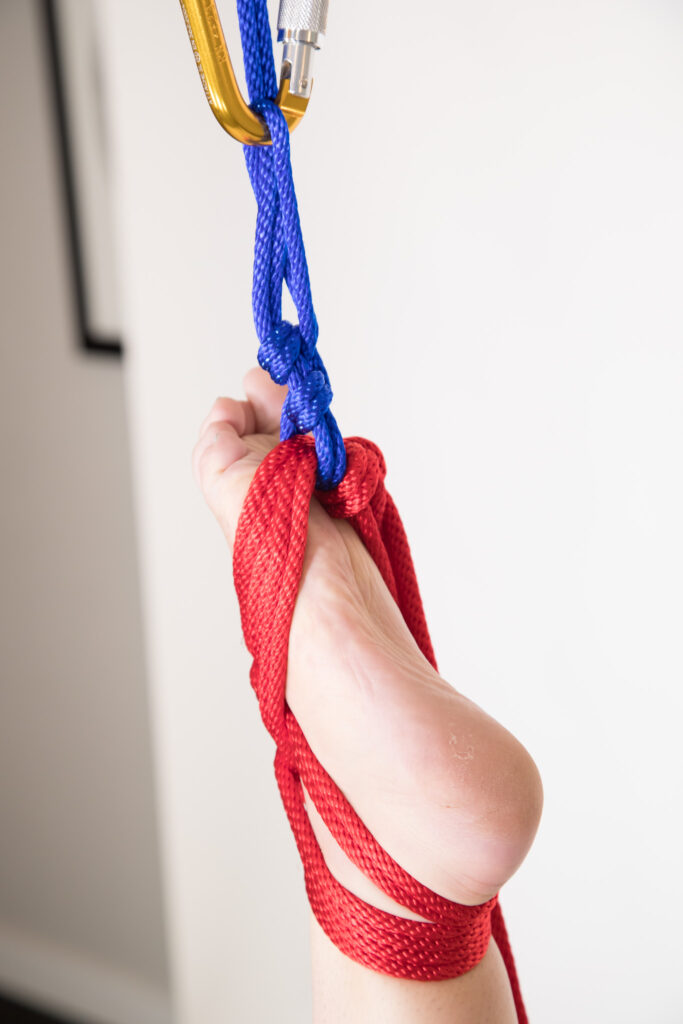
- You have two options for attaching the gravity boot, either run the excess line (use a 30ft length to tie) to the hard point or add a carabiner under the foot
You’ll want the tie to be looser if you want to attach using a carabiner so you don’t put pressure from the carabiner on the bottom’s foot.
Additionally centering the attachment will be import in making this sustainable.
- You can do this tie without weaving, however weaving adds stability and will tend to spread tension more evenly.
- Using post-suspension marking to evaluate evenness of loading
Some ideas of possible uses:
- Attach your gravity boots to a hip line, chest harness, hands, hair tie or crotch line for a hogtie
- Attach to a bedpost for a more comfortable spread eagle
- Attach your running lines behind hips for a forced seated lotus or cross-legged position
- For a predicament partial attach a gravity boot to arms (run through ring), the bottom can choose will need to choose between the stretch of having their leg pulled up or fully extending their arms and keeping their balance, use a hip line here for safety
- Could be used to hobble a bottom, this tie already places a large knot on the bottom of the foot, you could make this larger to create an attractive hobbler.
This post was created in collaboration with Tornus a wonderful instructor – you can see more of his work at Full Circle Kink.